
💡 Prerequisites

Hello, this is the BEPRO team!
In this article, we'll introduce how to create presets from frequently used labels in projects to make initial project setup much faster and more convenient.
Project Label Presets
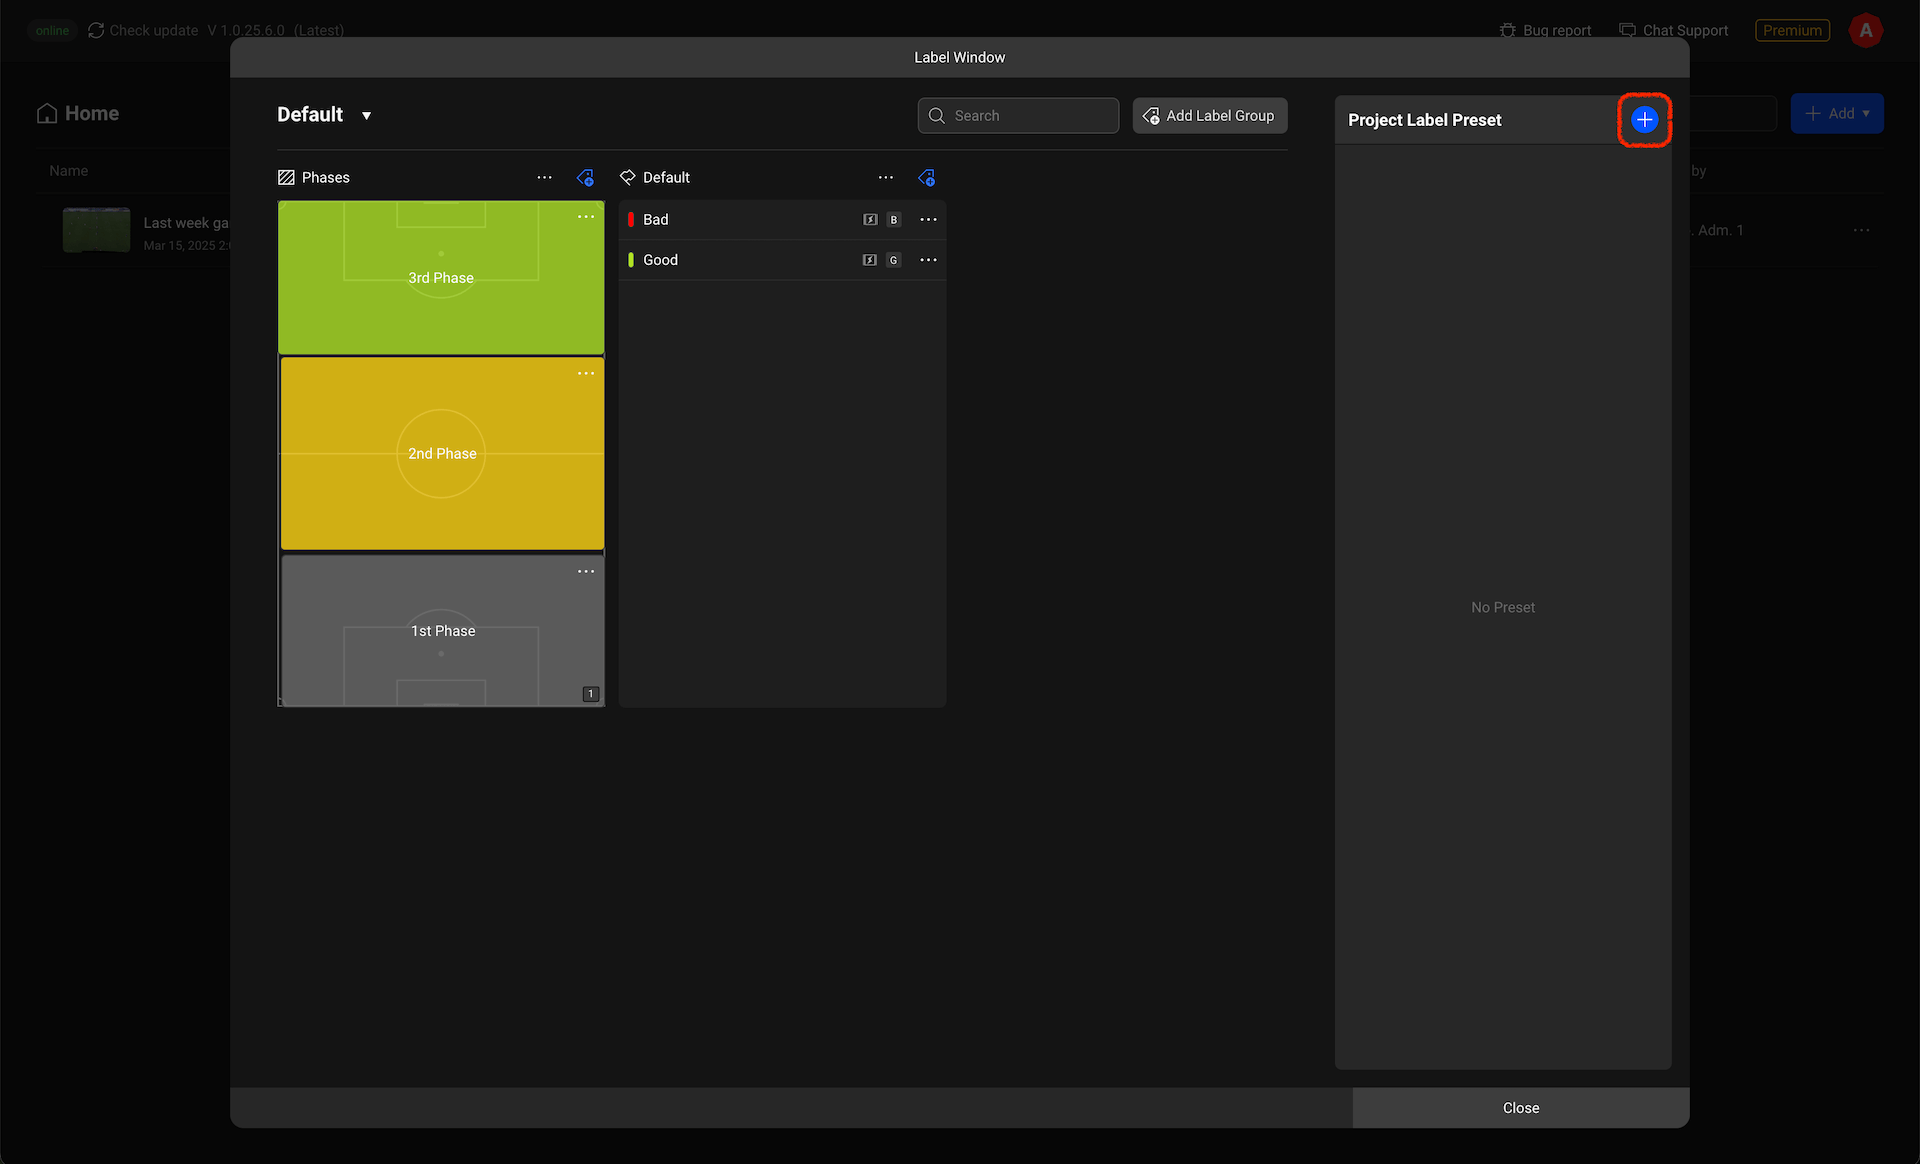
On the right side of the label management modal, there's a project label preset panel where you can add presets by clicking the button at the top.
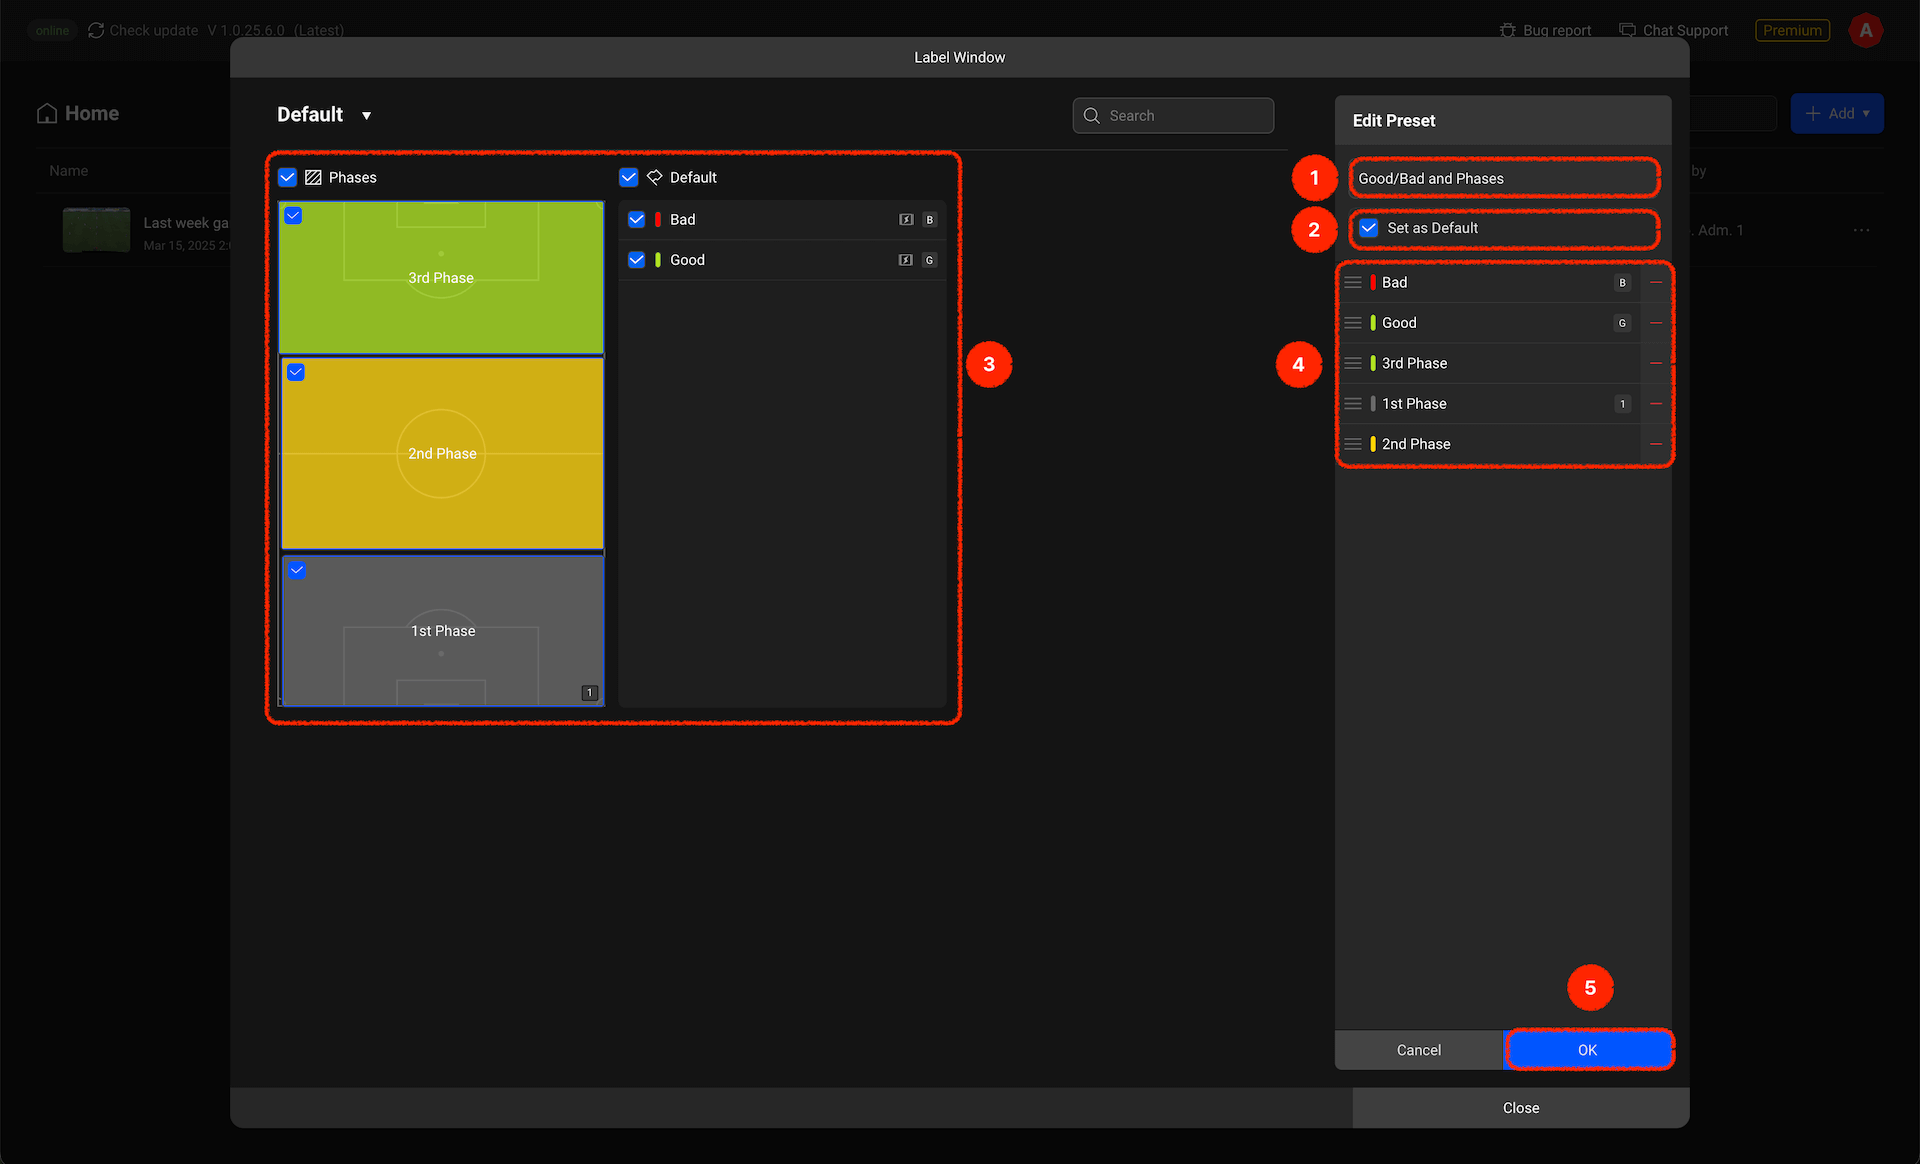
When you enter label preset editing mode, the screen layout changes slightly. Let's examine each item:
- Label Preset Name: Sets the name of the label preset.
- Set as Default: Configures this preset to be selected by default when starting a project.
- Label Selection: Select the labels to add to the preset.
- Selected Label List: This is the list of labels selected to be added to the preset, and they will be input into the timeline in this order. You can remove them or change their order.
- Complete: Once you've finished configuring the preset, click the complete button to save it.

Now that we've created a label preset, let's see how to apply it in a project.
Using Label Presets in Projects
.png)
First, create a new project.
.png)
- When creating a project, a project label selection modal appears, and the label presets you've created will appear in the top right corner.
- Clicking on this will register the labels you've previously added to the preset as project labels.
- Clicking complete will finish registering the preset labels as project labels.
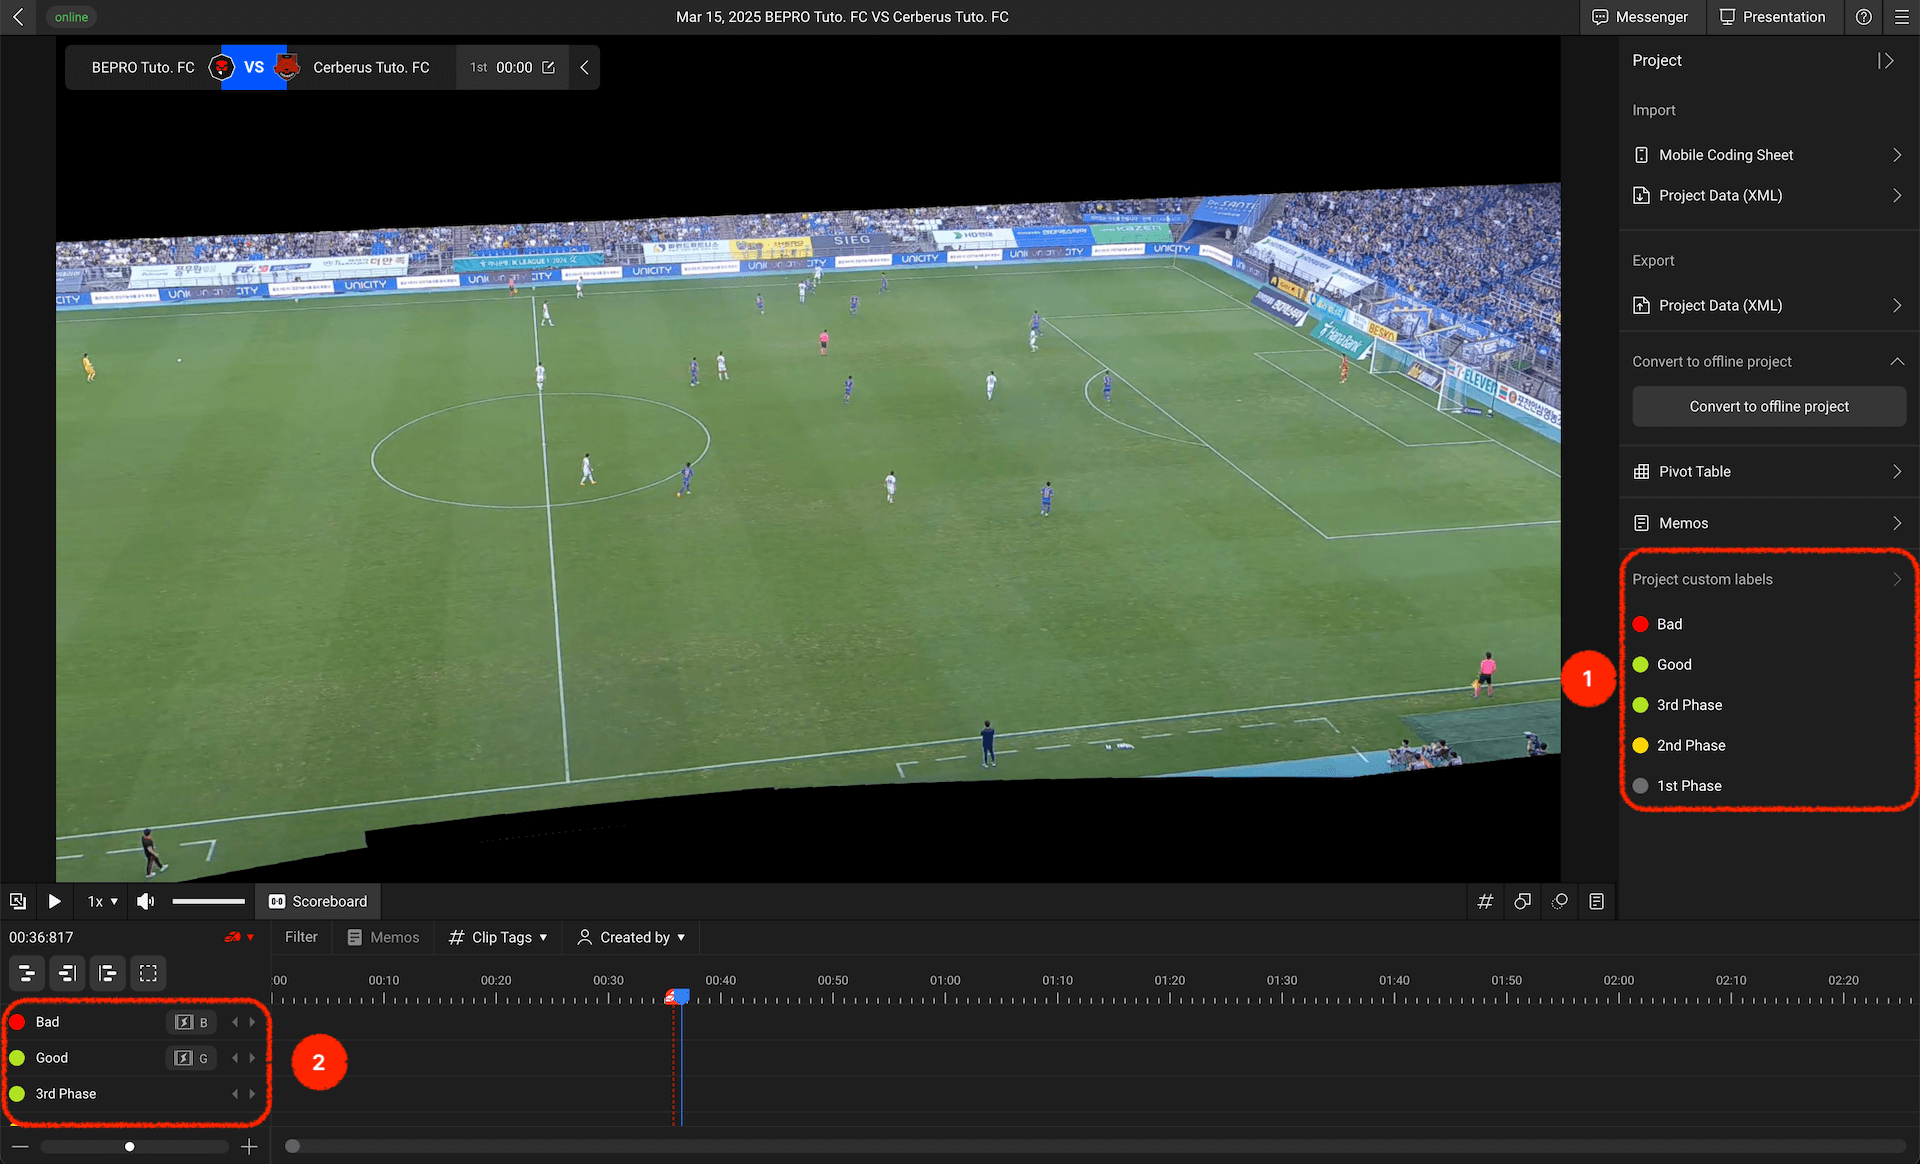
When you run the project, the project labels will be displayed at the bottom of the right panel, and tracks will be created on the timeline with these labels.
Create presets from your frequently used labels to make project starts even more efficient!